Is your makeup drawer a complete mess? Are your brushes and powders strewn all over your bathroom counters and bedroom desktop? The good news is, you can actually organize your makeup so it looks like a professional setup without spending a ton of money.
There are some very creative and exciting DIY projects out there when it comes to a makeup organization. It all depends on you and what you want, so let your creativity take over and these ideas inspire you!
Stack Some Glass Tumblers in a Pyramid

This may be perhaps one of the easiest ideas out there because all you need is some glue and some lovely glass tumblers. You can arrange them in a pyramid so they all open up on one side, and fix them together.
Then, you can use different ones for your lipstick, nail polish, mascara — whatever you want. Make sure that you choose glass tumblers that are tall enough for the items you intend to put in there.
Make a Glitter Chevron Makeup Tray
Sometimes, it’s as simple as having a tray where you can keep everything. That way, you can easily carry it from your room to the bathroom if you want, and make sure nothing rolls off your desk thanks to the raised tray edges.
There are some excellent ways to spice up a makeup tray, starting with this glitter chevron pattern. It’s done in purple and gold and adds a bit of glamor to the final look.
Hang Gorgeous Small Mason Jars
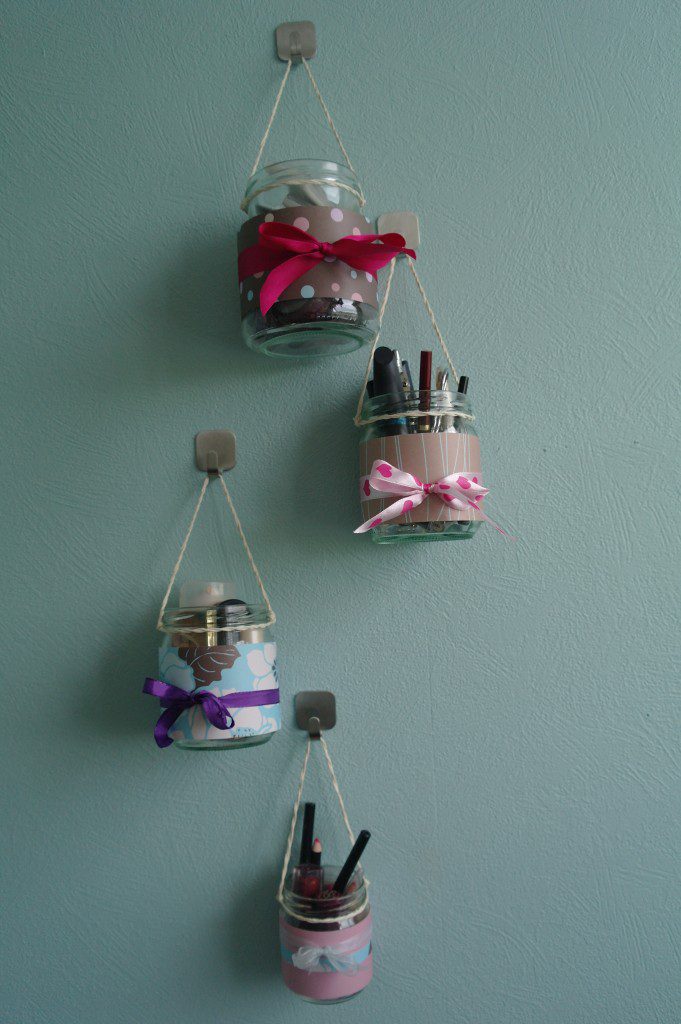
I’m a huge fan of mason jar projects, and this is a prime example of it. You can have different jars for different products, and hang each up on hooks at varying heights with a bit of string. Each jar has been decorated with a pattern and a lovely ribbon.
If you want an amazing DIY project for your makeup organization and you’re a fan of mason jars, check out the guide for this look here.
Repurpose a See-Through Shoe Organizer
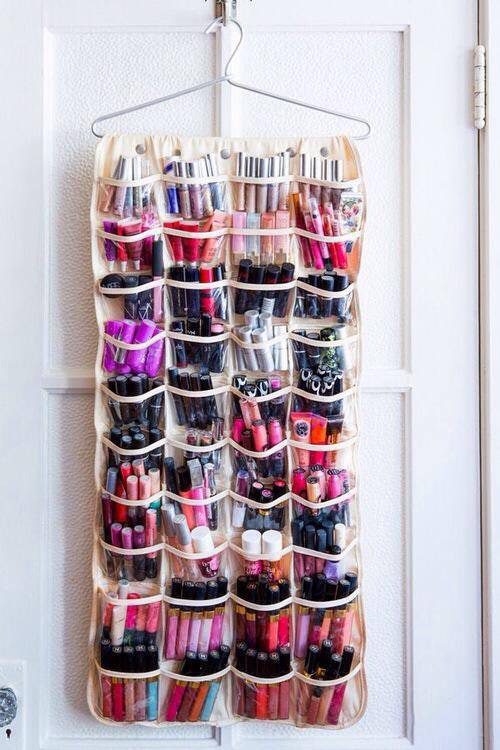
This is a great idea for people who have tons of makeup and nowhere to put it. It’s a see-through plastic shoe organizer that you can get to hang on the back of a door. However, instead of shoes, fill each pocket with different products.
The see-through effect makes it a lot easier to find what you’re looking for without getting overwhelmed, and the pockets are actually just the right size for makeup products.
Make a Chalkboard Jewelry Organizer
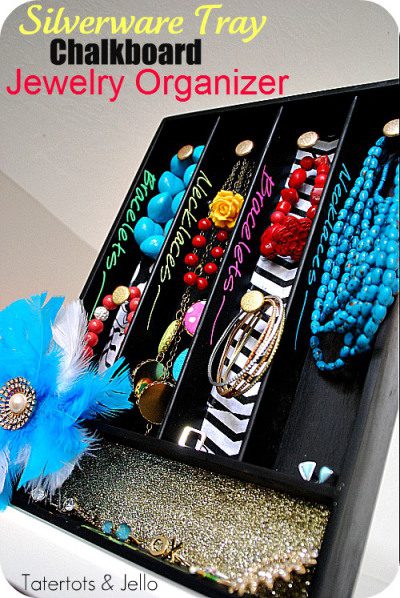
This is a really clever idea that anyone can do. It requires converting a silverware tray into a jewelry organizer. The jewelry tray has been painted black to be more glamorous, and the sides are done in chalkboard to add in details and labels.
Some large nails have been added to the top of each section so you can hang all of your bracelets and necklaces without them getting all tangled up in a drawer.
Create a Framed Nail Polish Display
There is something very lovely about the simple nail polish display here. It’s been created with an old fashioned or vintage style of a picture frame and painted white. Some narrow shelves have been added across the frame, and the whole thing is set to hang in a room.
It’s perfect for a nail polish display as the shelves are just wide enough to accommodate the bottles and they add some color to the white frame.
Decorate a Rolling Cart for Mobility
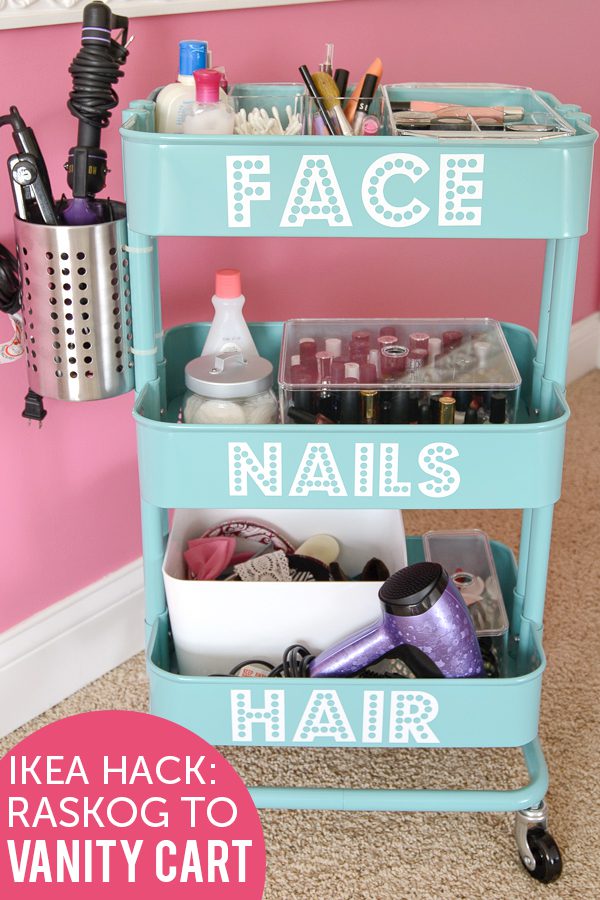
If you want a whole vanity setup that you can roll around your room or bring to the bathroom, you’ll want something like this spruced up rolling cart. It’s done all in pastel blue with different labels for the shelves so the final result is feminine.
There’s a lot more than just makeup here, with space for nail polish, remover and cotton pads, hair products and accessories, a curling iron and straightener and a blow dryer.
Decorate Your Makeup Brush Holder

Perhaps all you want is to organize your makeup brushes or add a few small touches here and there to an existing organization system.
A great DIY option is to put your brushes and accessories in large glass vases or containers and anchor them with some glass pebbles or stones. In this example, the clear glass stones and glass vase make for a lovely set of easily accessible makeup brushes.
Make a Cute Linen-Lined Wicker Basket
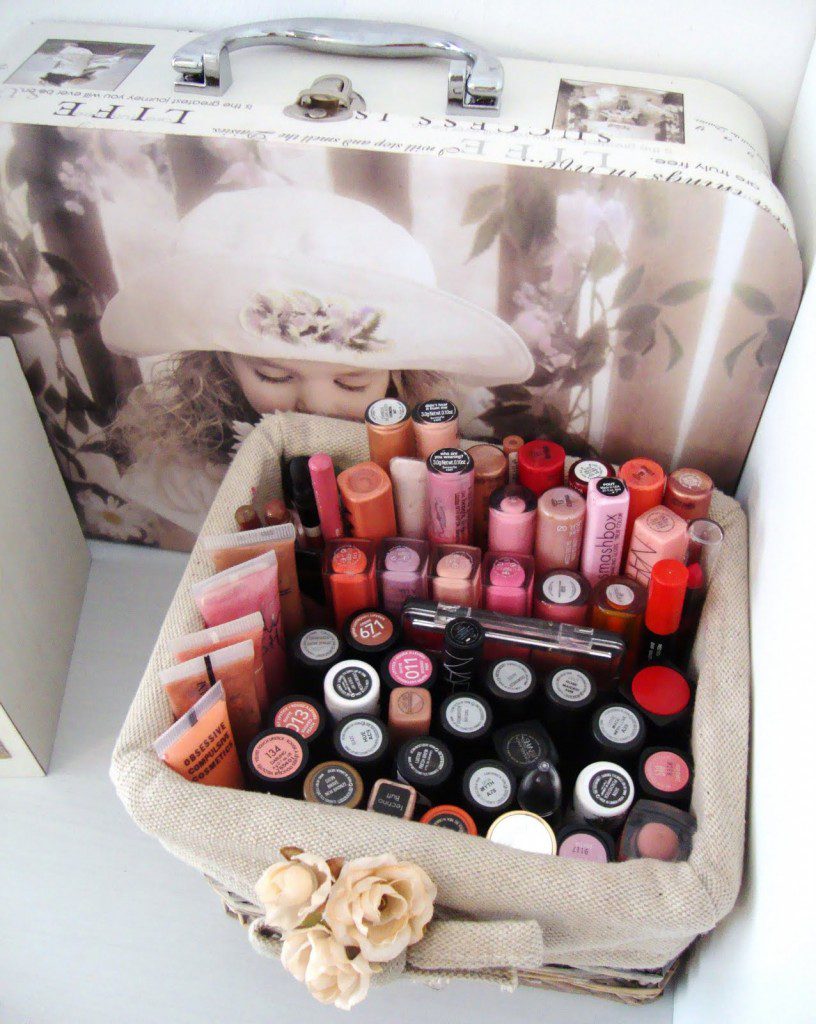
If you want to go for a more rustic and farmhouse look, there are some good ideas here. The container picked for makeup organization is a wicker basket, and to keep things tidy inside, it’s been lined with a beige linen fabric.
Some white roses have been tied to the front to add an extra romantic touch. It’s the perfect basket to grab and go or just keep in one spot to make sure everything stays together.
Use Empty Boxes for Storage
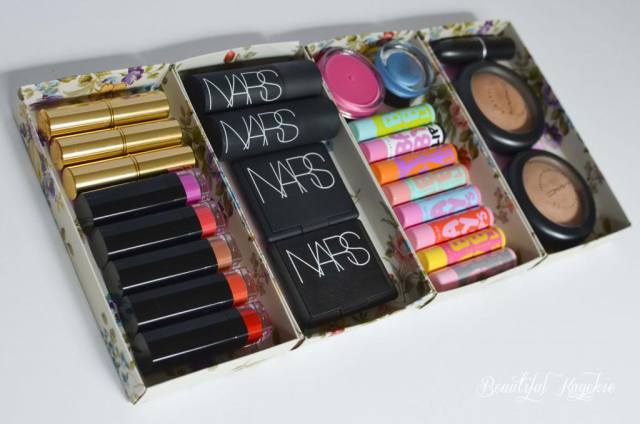
These old gift boxes are a great size to combine together for DIY makeup storage. They’re just wide enough for lipsticks and lip glosses, as well as some face powder, eye shadow compacts and mascara.
If the boxes are plain, you can line them with some colorful wrapping paper to bring some life and brightness to your setup.
Stack Different Patterned Cans on a Tray
I really like this idea, because the tray can be revolving and spun around for easy access to everything. Some cylindrical containers and cans have been covered in different fun patterns and each has a thick black band around the top.
It’s excellent to store items of varying sizes because the final result isn’t one unified look. The best part is that the tray can be moved around easily to any part of the room.
Make a Glass-Covered Makeup Vanity
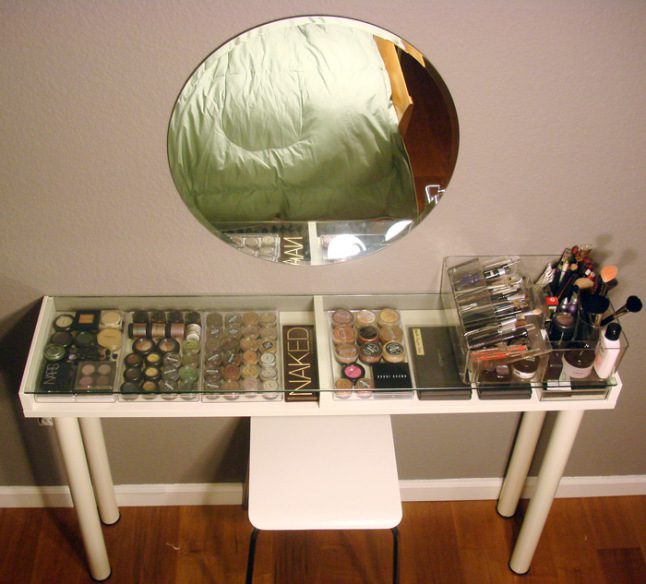
This DIY makeup organizer involves a whole vanity, which is a great way to go if you don’t yet have one. It’s a simple table except with a glass top, and underneath it are many drawers filled with makeup. There’s also a stool and mirror to complete the vanity.
The reason it’s such a good idea is that you can immediately see everything that you have and quickly find what you’re looking for.
Use Lace-Patterned Plant Pots
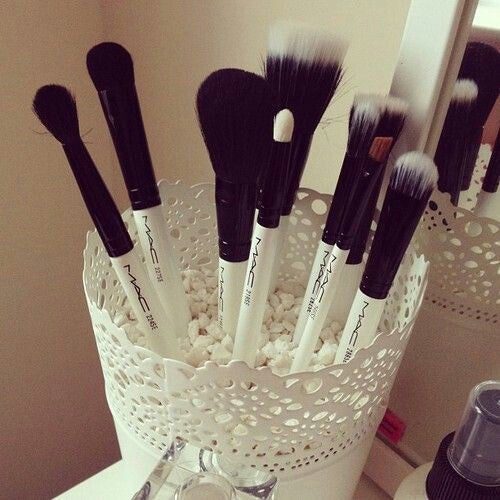
These plant pots rimmed with lace detailing are very delicate and lovely for use as makeup brush holders. The white is a calming and neutral color, which is good, but you can do this with any plant pots that you have.
The pot itself is filled with lovely white stones so that any makeup brushes stuck in there will stay upright.
Hang Mason Jars for Different Toiletries
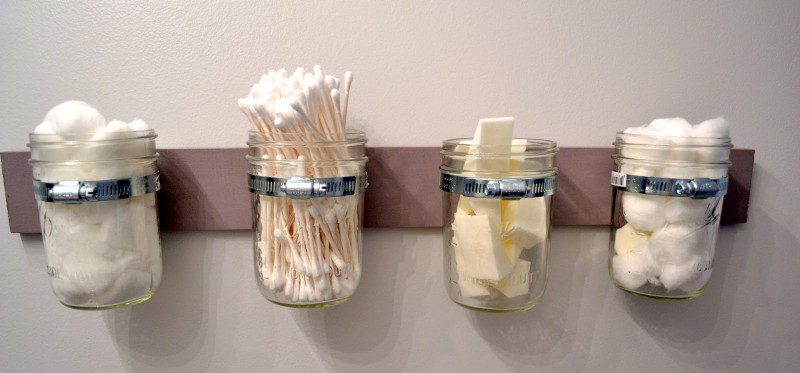
This is another fantastic idea involving mason jars. In this case, they’ve been attached to a backing plank of wood for a hanging display that’s quite useful.
In this example, the DIY project has focused on setting up these mason jars for makeup or nail polish removal accessories, like cotton pads, cotton balls, and swabs.
Repurpose a Vintage Bundt Cake Pan
This idea reuses something many people may have lying around at home unused — an old tin bundt cake pan.
It’s a clever idea because the round, deep part of the pan can have most makeup items stored there, while the little pyramid in the middle for the cakehole can fit some brushes. It creates a rustic effect thanks to the use of a vintage item paired with a weathered and chipped table.
Cover Your Jars in Glitter for Extra Sparkle
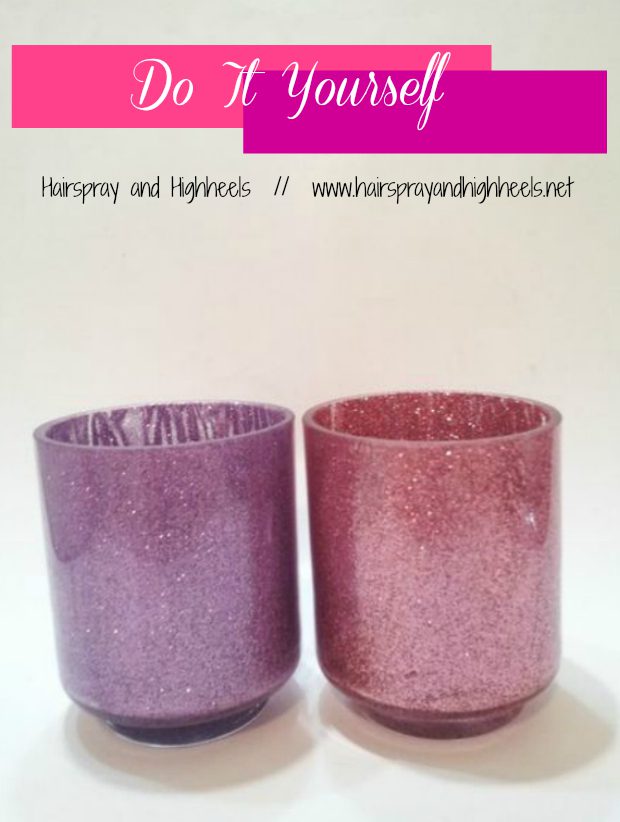
Another option is just to use some old jars that you have lying around because they’re usually the perfect height and size for DIY makeup storage. Instead of keeping them plain though, you can easily spice them up with some glitter.
Look for different colored glitter options, like the bright pink and purple combination pictured here, which looks absolutely glamorous.
Stack Some Vintage Plates and Cups
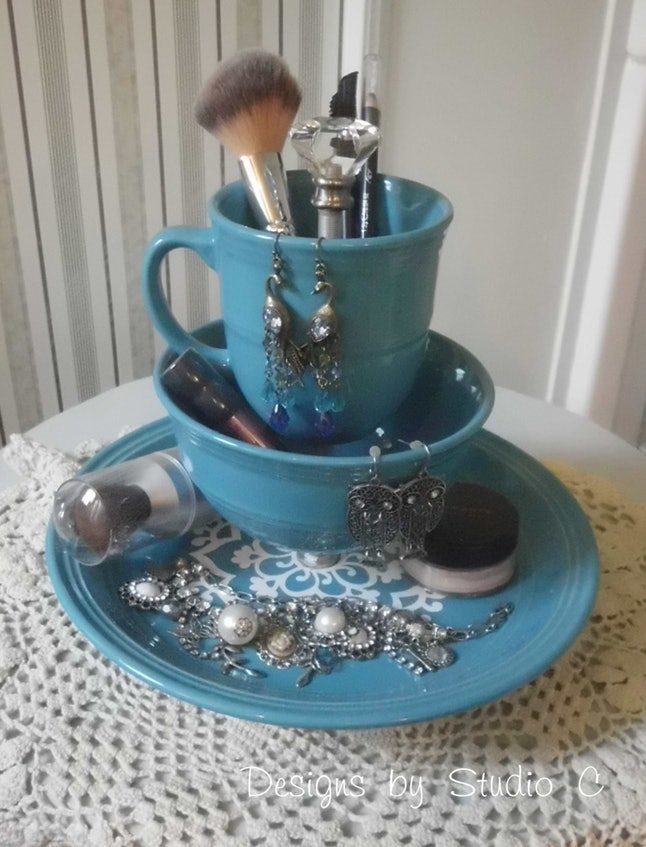
This is a lovely vintage DIY makeup storage organizer, and it’s been made using some vintage tableware that most people have lying around or can easily find at an antique shop. In this case, there’s a large mug that’s been stacked in a bowl, which is on top of a plate.
Each piece clearly comes from the same set since they’re all the same color, and it creates a three-tiered makeup organizer when it’s all done.
Make a Mobile Roll-Up Vanity
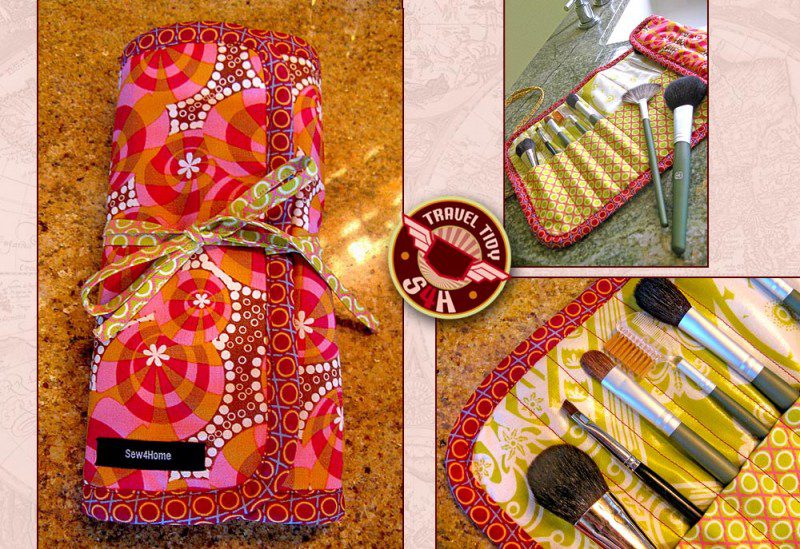
Sometimes, you might want your makeup to be portable and easy to take with you, especially if you do your makeup on the go. If that’s the case with you, you should try to make something gorgeous and clever like this roll-up portable vanity.
By using old quilts, this artist has created some pockets to store different makeup tools. The whole thing can be rolled up tightly and tied with a fabric bow to keep it shut.
Add Labels to Different Storage Jars
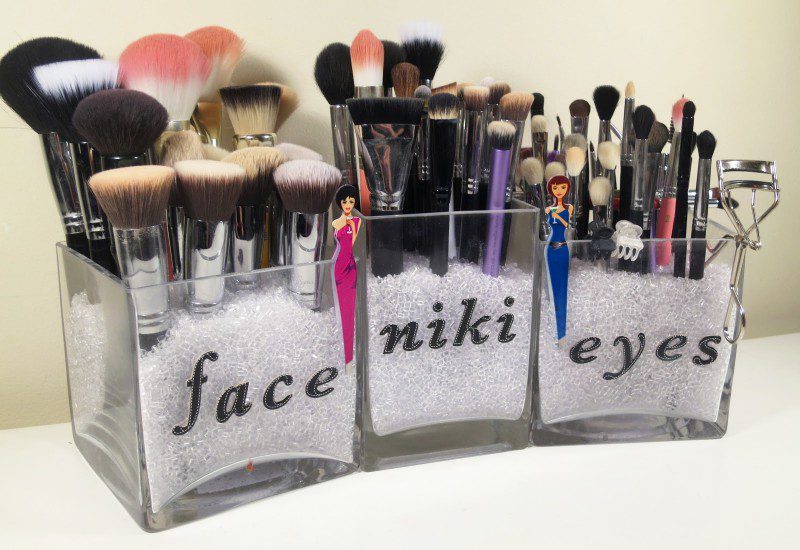
We’ve seen DIY makeup organizers that look like these storage jars, but a great move, if you decide to create a few of them, is to add some lovely labels. You can do that with some stick-on labels or even a marker.
That way, you can make sure to keep all your makeup brushes separate from each other, so you don’t mix up your eye brushes from your face ones.
Paint Mason Jars in Glamorous Colors
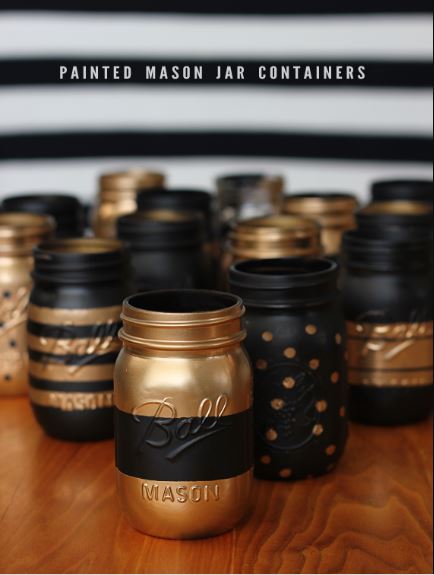
Painted mason jars are an excellent way to spice up average storage options, and some interesting paint can take the jar from average to glamorous very easily.
Consider the colors you want to paint them in, so they match the rest of your decor; I really like the black and gold combo here. Then, paint them in fun patterns, like thin or thick stripes, polka dots, chevrons, and more.
Make a Rustic Brush Holder From a Log
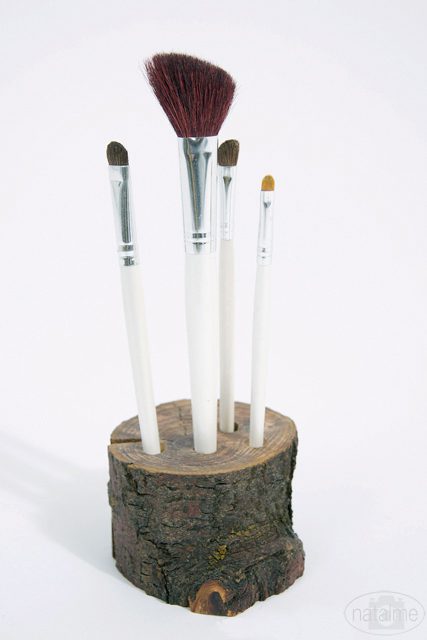
This is an amazing idea, especially if you like the rustic look. What you’ll need for this one is a small section of a tree trunk, without removing the bark or polishing the wood in any way. Then, you can drill some holes into the top of the log of different sizes.
It’s the perfect brush holder, and it’s easy to make a hole bigger or add another one if you need to for your brushes.
Use a Sushi Mat for a Rollaway Makeup Kit
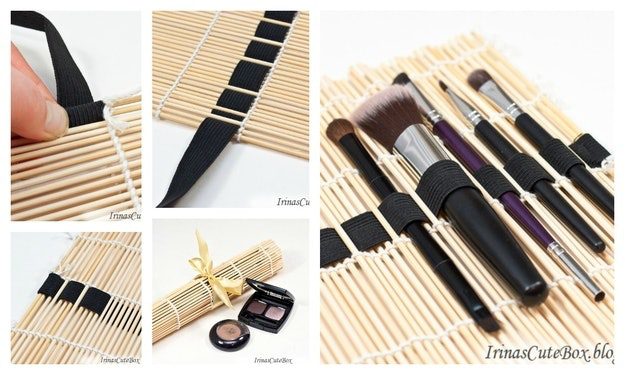
If you’re a fan of the roll-up makeup kit that was featured earlier but you don’t have the right materials or you don’t like sewing, you can make a similar kit by reusing a sushi mat. Get a black ribbon and feed it through the map, allowing some space to slide in brushes.
For this to work perfectly, you’ll want to find a black ribbon with an elastic inside so it can stretch and accommodate the brushes.
Create a Magnetic Board for Makeup
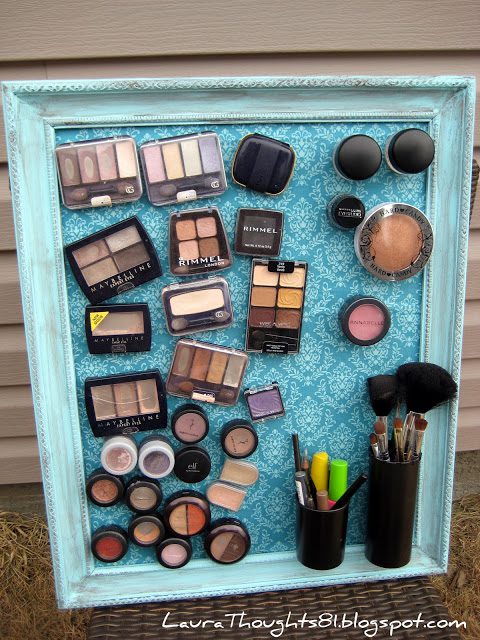
This is a gorgeous magnetic board that’s been added to the inside of a picture frame in a stunning blue shade. Some magnets have been added to the base of every makeup compact and brush so they can hang magnetically from the board.
It’s quite easy to create this magnetic board and a fun artistic project for anyone to make; the full guide to doing so can be found here.
Build a Two-Tier Organizer With Tin Cans
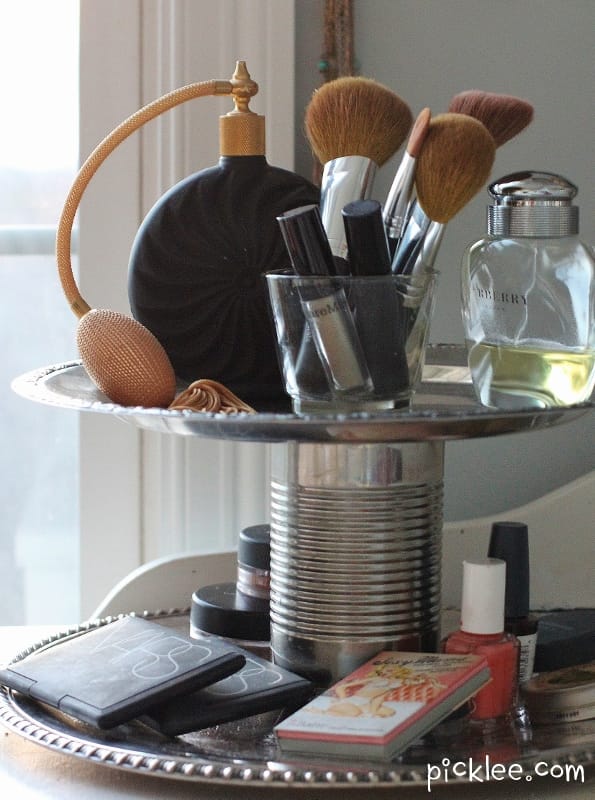
This tin can DIY makeup organizer is excellent for making a two-tier makeup organization system because the tin can has been attached to two tin trays for different storage levels. The result is quite simple, but also lovely in a vintage way.
Make Your Own Drawers From Cardboard
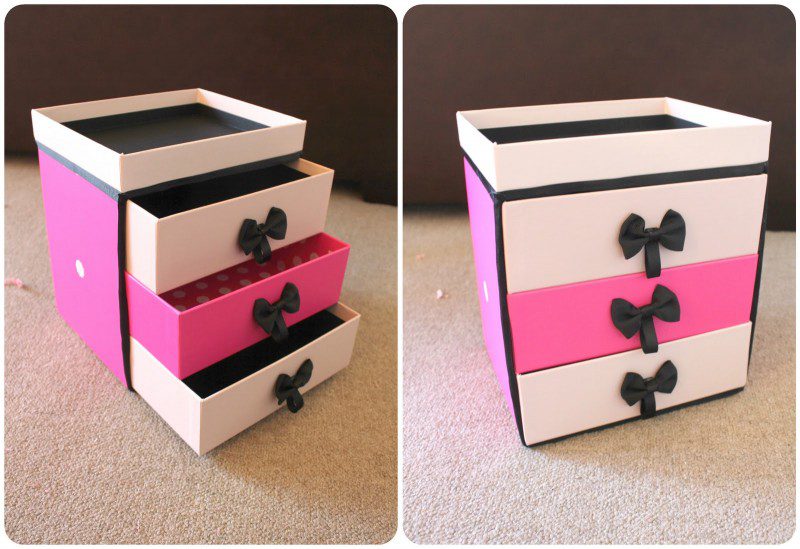
If you’d rather store your makeup away out of sight instead, you can do so with this clever cardboard box with drawers. There are three different drawers that can slide out and they’ve been decorated in two shades of pink, with a black bow in the center of each.
Similarly, the black box containing them is a darker pink with a black trim. It’s excellent for putting your things away when you’re not using them.
Use Colorful Recycled Plastic Bottle Bottoms
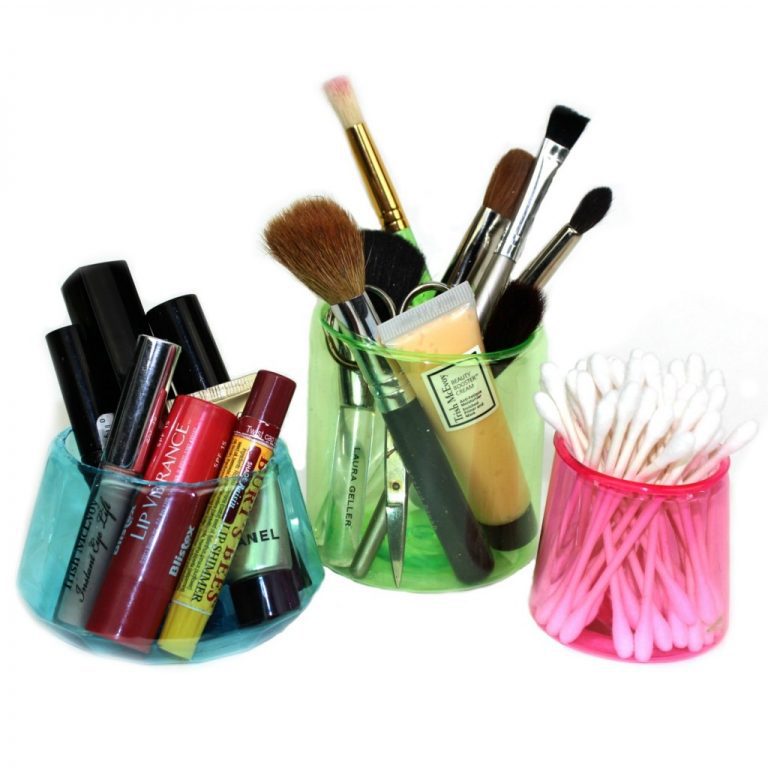
This is one of the simplest and cheapest ideas out there, except as you can see the final result is still very nice. What you’ll need are some plastic bottles of different colors, the bolder the colors the better, and you can cut them to the height you need.
Put a hot iron on the ends of the bottles for a moment to soften the plastic edges, and then you’re done! You’ve got a creative makeup organizer.
Final Thoughts
Hopefully these ideas have shown you that organizing your makeup drawer doesn’t have to be a daunting move or overly complicated or expensive. There are so many different possibilities for DIY makeup organization and many of them don’t require you to spend any money.
Look at the materials you have to work with or if you have anything around the house that you don’t need that can be repurposed for your needs. It also helps to decorate something with a bit of color, ribbon or paint to make it pop. Which one was your favorite idea?